Uploading User Data
Share911 / Share999's Import People feature simplifies user management by allowing you to upload a spreadsheet of user data. With your spreadsheet, you can quickly perform common administration tasks such as creating accounts for new hires, updating contact information for existing accounts, and removing terminated staff.
This article describes how to import Staff members. For instructions on importing Students and Guardians, please see our article here: Import Students and Guardians
CONTENTS
- Obtain the Required Permissions
- Create your spreadsheet
- Visit the Import People page
- Perform the upload
- Understanding the results
1. Obtain the Required Permissions
To import users, your account must first have the Manage Users permission. If you need to have this permission added to your account, please contact your Share911 / Share999 account admin or email support@share911.com or support@share999.co.uk for assistance.
2. Create your spreadsheet
File Formats
Share911 supports the import of staff data via spreadsheets in XLS, XLSX, ODS, or CSV format.
Example Import Files
See the Determining Channel IDs section below for details on those values.Delete Action
Required columns
For the "delete" action, there are 2 required columns:
- Action
- One of: Employee ID, Email, or Mobile
A value of "delete" in the "Action" column indicates that the user has been terminated and should be removed.
When deleting, at least one of the Employee ID, Email, or Mobile columns must have a value. All other columns are ignored. Share911 will search through our database and remove the first matching record found. If more than one column is supplied, search order is first by Employee ID, then Email, then Mobile.
Examples of Delete Action:
Example
| Action | Employee ID | |
| Delete | 012345 | john@example.com |
| Delete | 123456 | mary@example.com |
| Delete | 234567 | jane@example.com |
| Delete | 345678 | mark@example.com |
There is no harm in requesting a deletion more than once. For example, if the terminated user has already been manually removed, including them in the spreadsheet will not cause an issue during processing.
Save Action
General Rules
- Share911 does not require making a distinction between new users and existing users; if an existing user is not found Share911 will automatically create a new user account and email them an invite.
Required columns
For the "save" action, there are 2 required columns:
If an account does not already exist then it will be created and an email invite sent.
Optional columns
- Action - with value of "save"
- Employee ID
- First Name
- Last Name
- Mobile
- Title
- Shift
- Manager IDs
- Emergency Contact Name
- Emergency Contact Phone
- Emergency Contact Email
- Permissions
- User Groups
Examples of Save Action:
Example
This import will save 2 staff records. The "Action" column is not needed since the default Action is "Save".
| Employee ID | First Name | Last Name | Emails | Title | Channel IDs |
| 012345 | John | Smith | john.s@example.com | Teacher | acme/school1 |
| 123456 | Mary | Green | mary.g@example.com | Teacher | acme/school2 |
Example
This user's email address and last name have changed due to marriage. Since their Employee ID has not changed, their existing Share911 / Share999 account will be found and updated. Note that we do not have to send information that remains the same, nor do we need to include empty columns.
| Employee ID | First Name | Last Name | Emails | Title | Channel IDs |
| 123456 | Mary | Yellow | mary.y@example.com | Teacher | acme/school2 |
Further Notes on Columns
- Column order does not matter
- Column header names are not case-sensitive.
- Column header names should not be duplicated.
- Columns that are not included will leave existing values alone. For example, if a "mobile" column is not included, existing user accounts will keep their current mobile values.
Determining Channel IDs
If you would like to use your organization's own Work Location IDs, please contact support@share911.com or support@share999.co.uk. We will map your Work Location IDs to the communication channels in Share911.
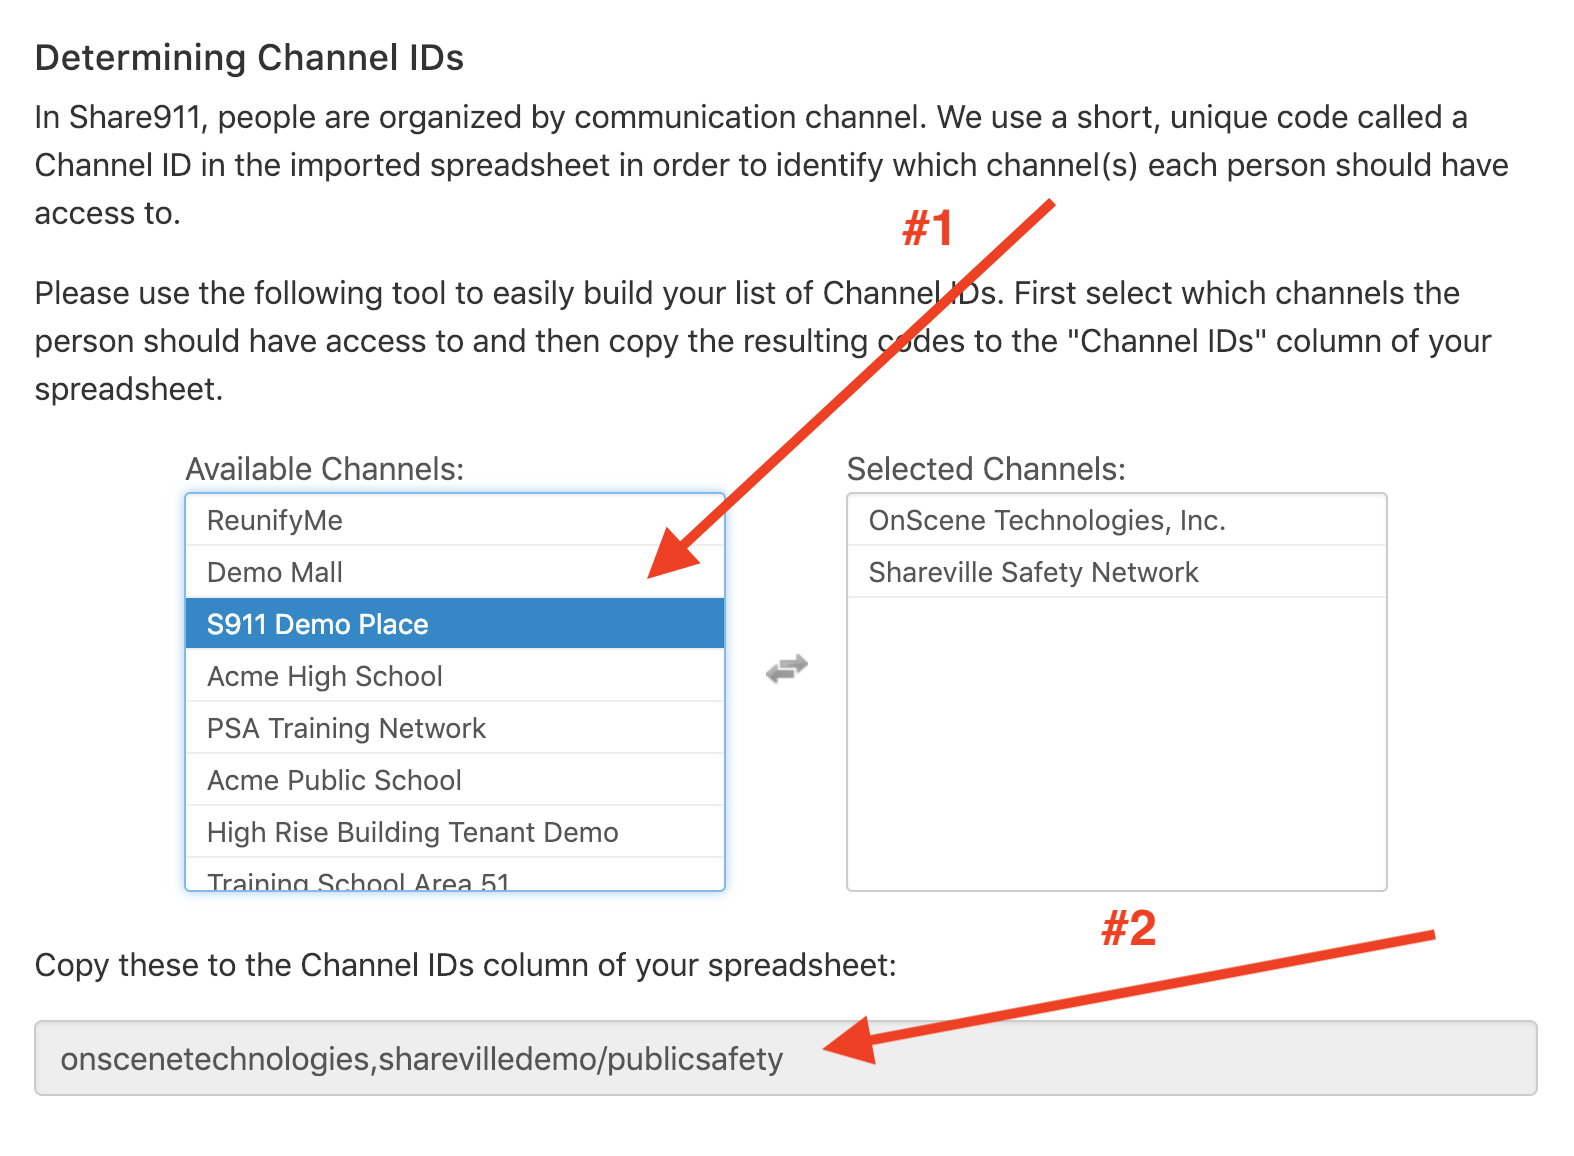
If you would like to use the system Channel IDs, the bottom of the Import People page has a tool which will display them for you. Channel IDs are the unique code that we use to identify a specific channel and are used in your spreadsheet to indicate which channel(s) a person should have access to. We use Channel IDs rather than channel names since the names may change while Channel IDs are permanent.
First select the channels that you want to grant someone access to. The Channel IDs for those channels will be displayed in the text box underneath. Then copy the contents of that text box and paste it into your spreadsheet in the Channel IDs column for the users that should have access to those channels.
3. Visit the Import People page
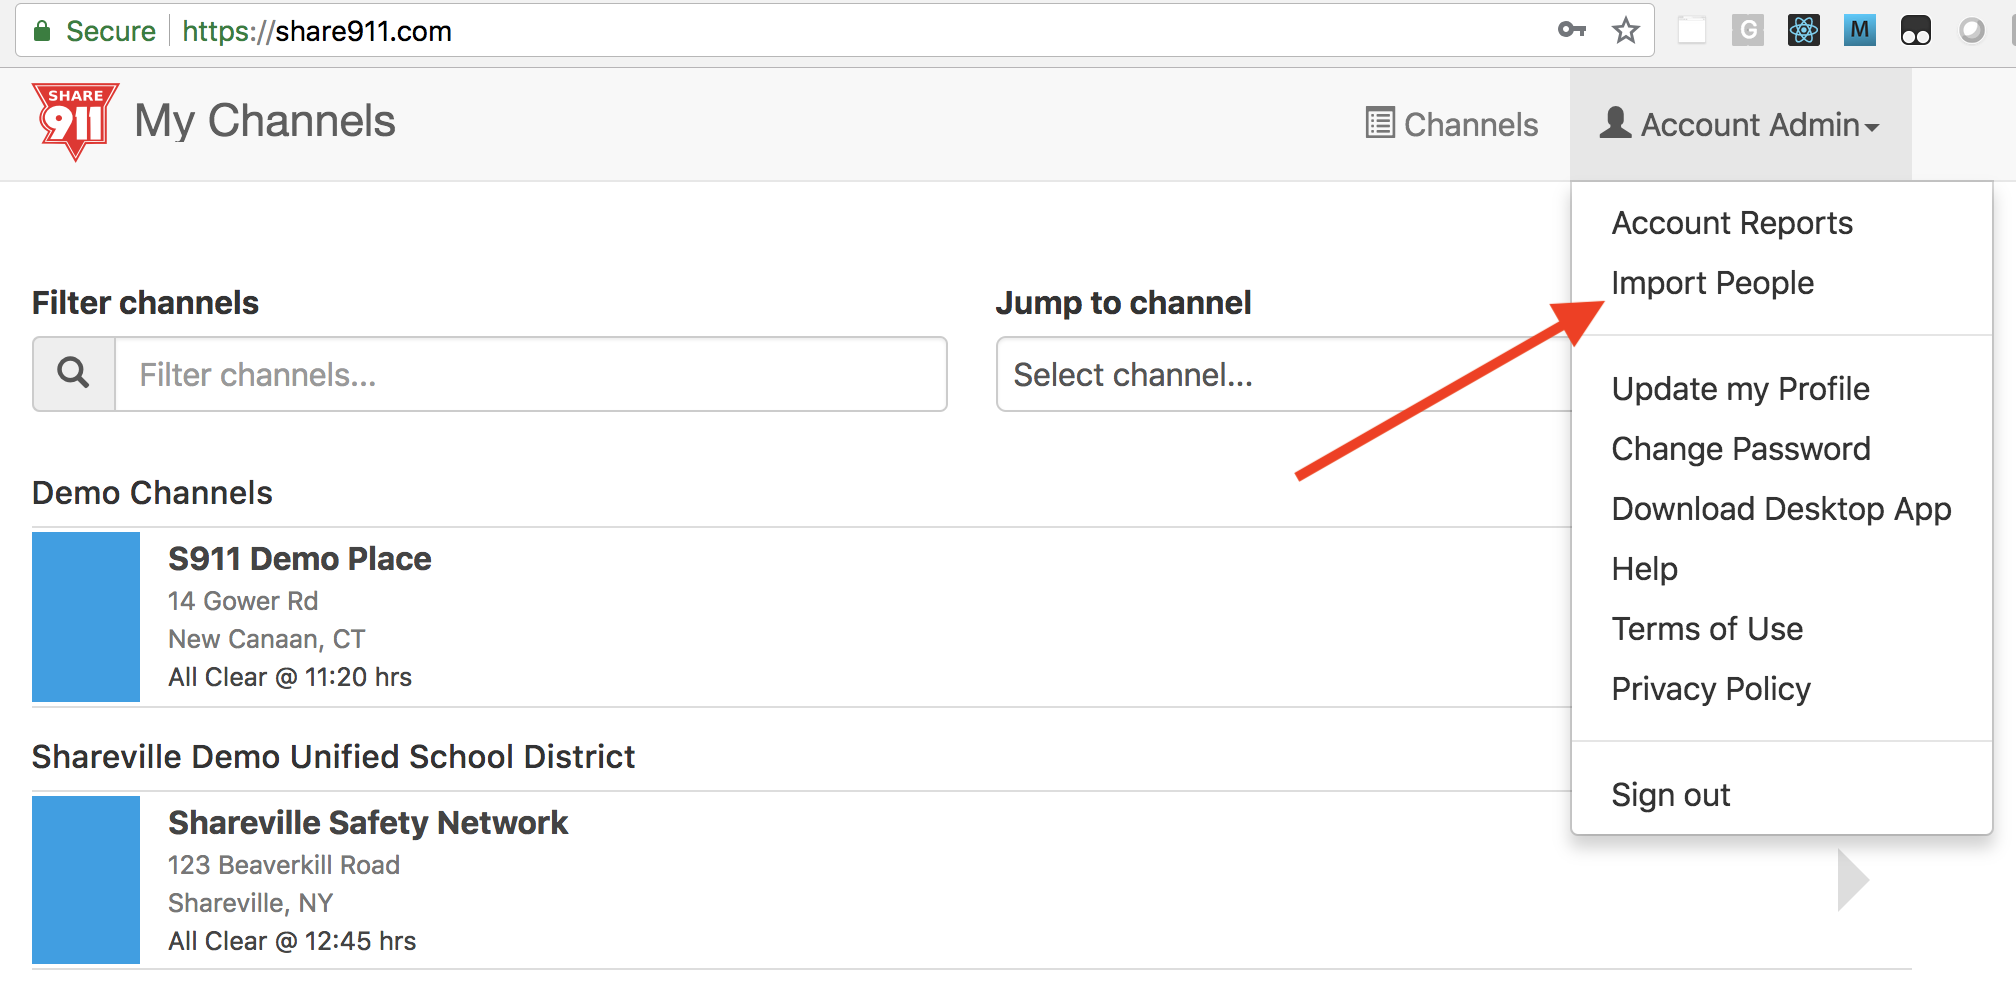
The Import People link is located near the top of your User Menu, found by clicking your name in the top-right.
4. Perform the upload
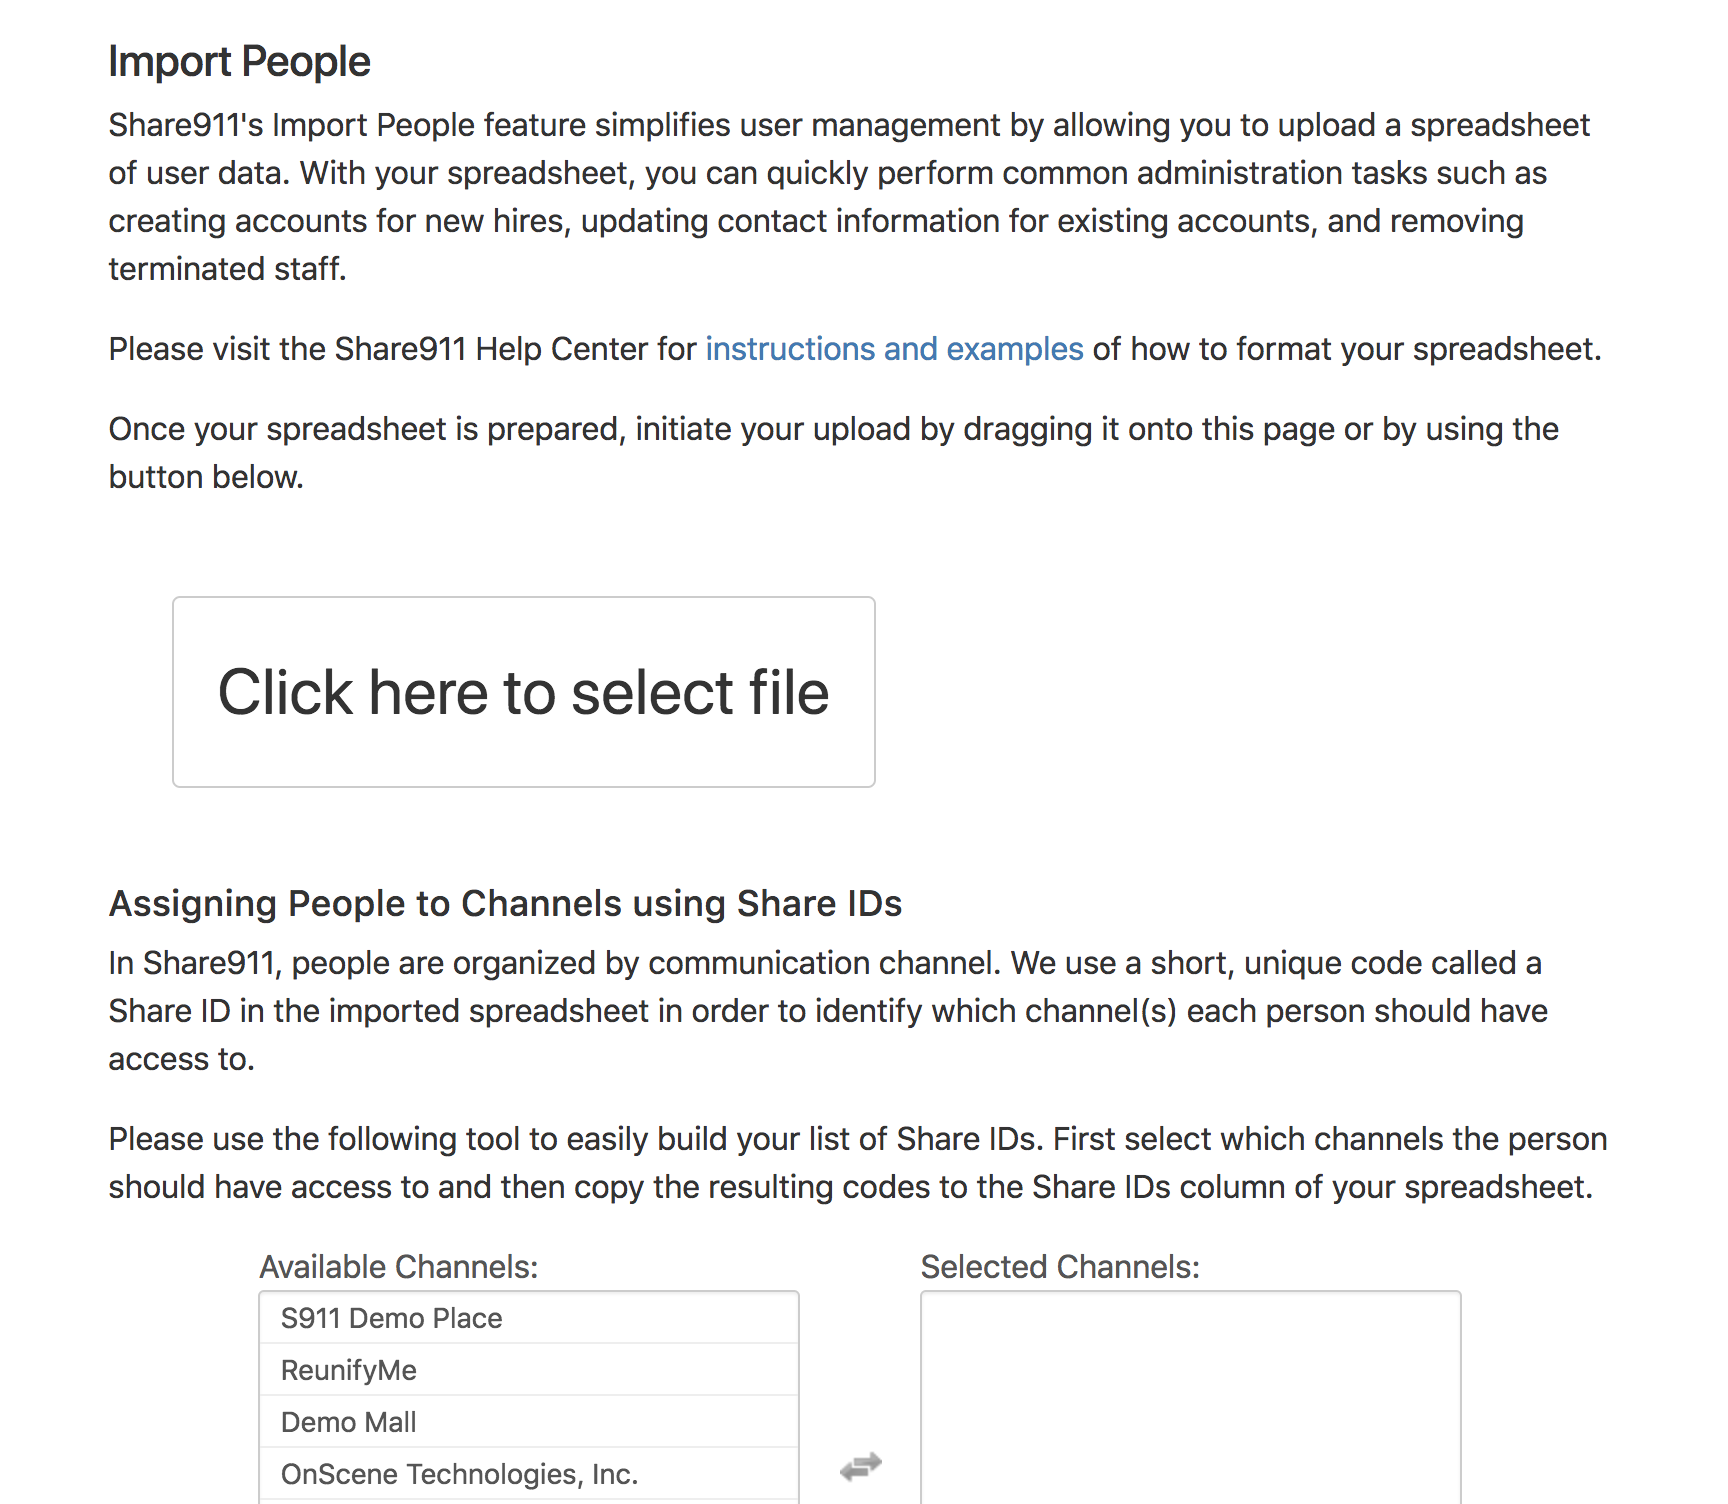
Drag your spreadsheet onto the page or click the "Click here to select file" button to initiate the import.
5. Understanding the results
Once your spreadsheet has been processed, you will be presented with a log of the results.
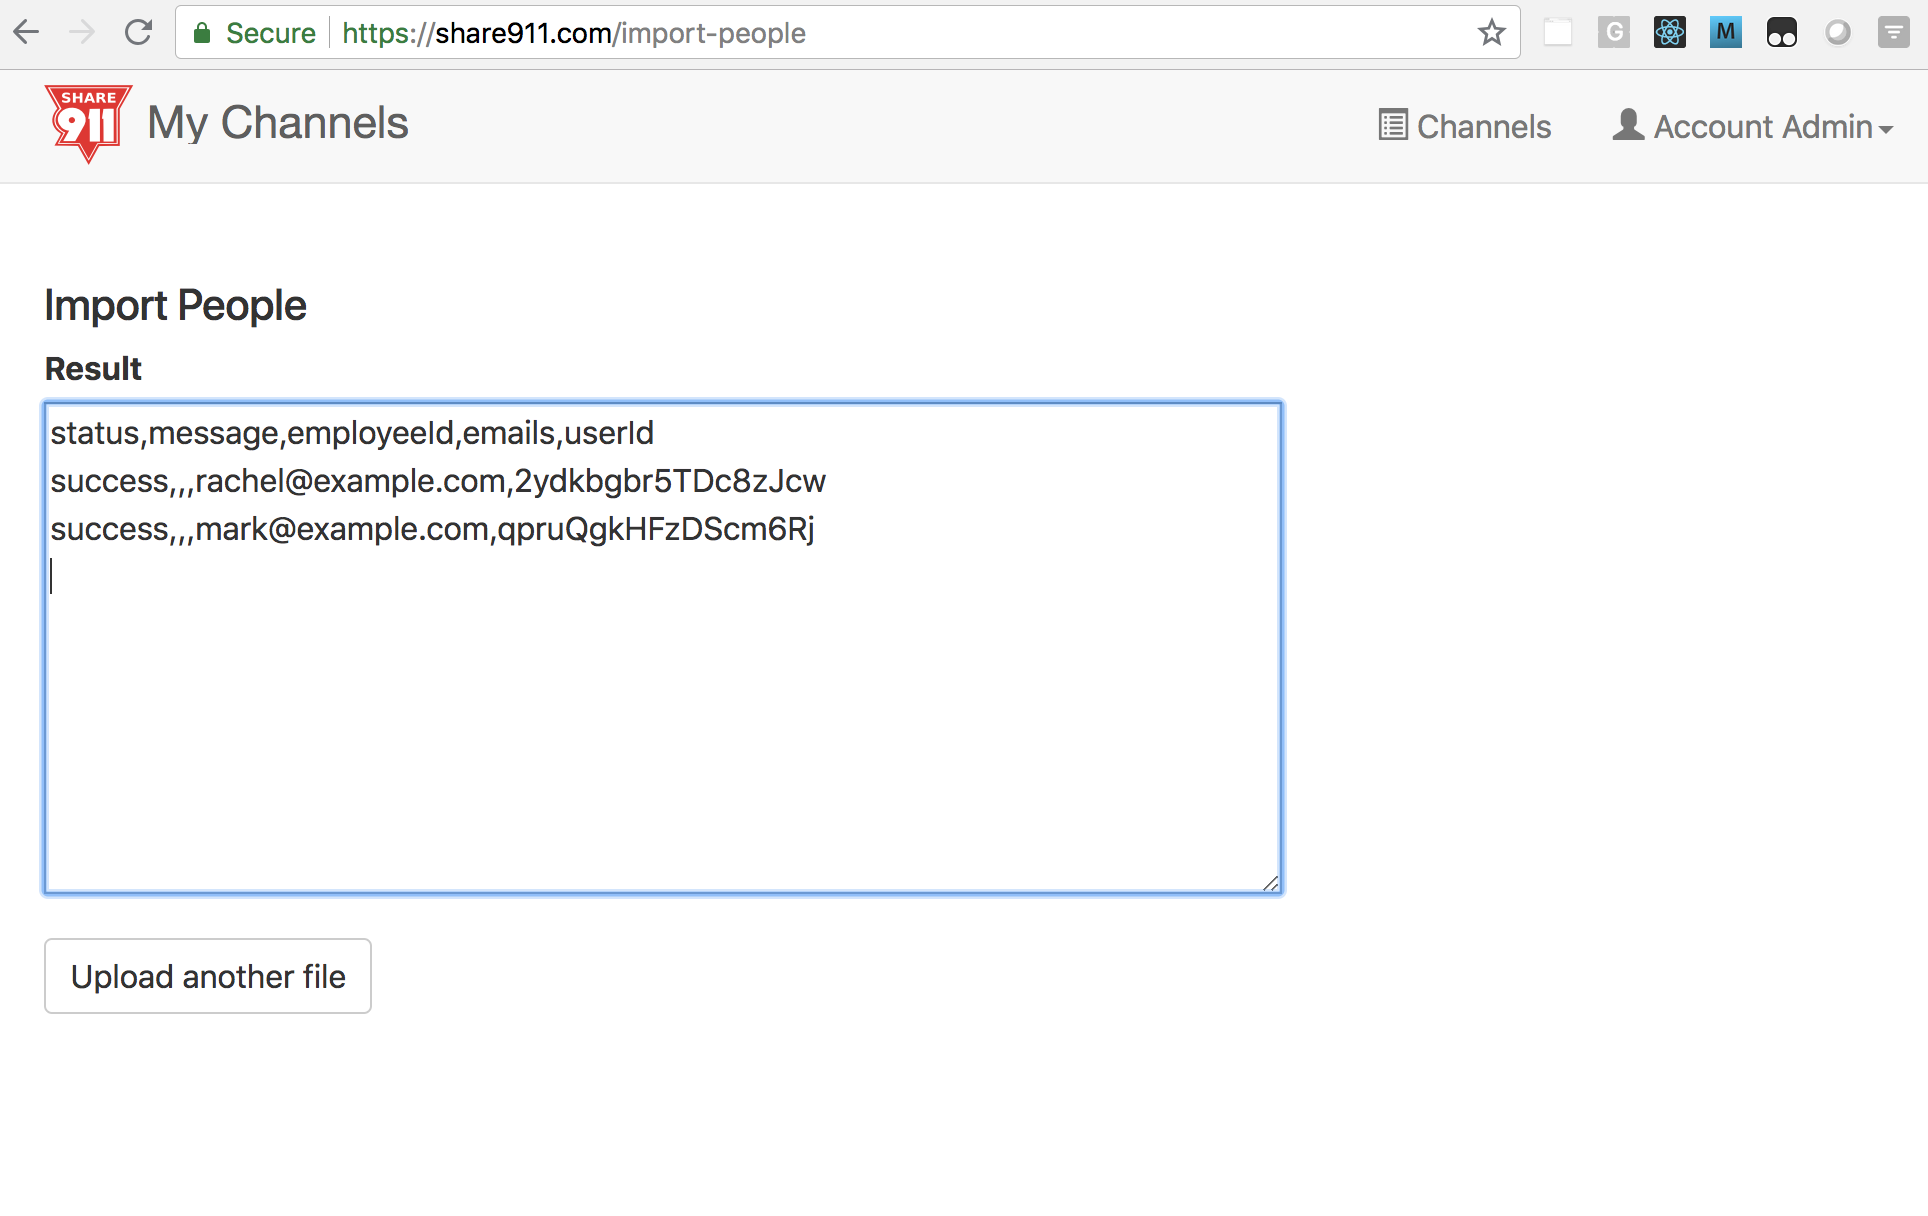
An error message will be displayed for any invalid spreadsheet rows. An error in one row does not affect processing of another row. If you need help resolving displayed errors, please contact support@share911.com or support@share999.co.uk. Some errors can be safely ignored, such as when an employee account marked for termination can not be found due to it having already been deleted.
Notes for newly created users
Newly created users will be sent an invite email. New user accounts created via import automatically have their email addresses marked as "verified" and will receive active and drill alert notifications via email and mobile if a number was supplied. They can also check-in using the link they receive in the alert notification.
Email invites will expire after 3 days. New users who have not accepted the email invite will be prompted to create a new password the first time that they attempt to log in.
While not required, we recommend encouraging all new users to accept the email invite so that they can quickly log in and initiate an event in the case of an emergency, rather than just respond to one initiated by someone else. Please see our Bulk Invite help page for more information. Users with access to more than one channel only need to be invited once.
