Description
This article outlines the steps needed to enable Single Sign On (SSO) between Share911 / Share999 and Microsoft Entra (formerly Azure AD) via SAML 2.0. SSO integration means that staff will be able to use their existing company password and authenticate with your organization's existing Entra roster to gain access to Share911 / Share999.
Staff will still be required to create a Share911 / Share99-specific password when enrolling so that they will have access when outside the corporate network.
Pre-requisites
You will need to have one user already created in Share911 / Share999 with Manage Channel permissions on your organization's root channel.
Outline
1. Access your root channel Integrations page in Share911 / Share999
2. Create a Share911 / Share999 application in Entra
3. Grant access to the Share911 / Share999 SAML app
4. Enter Entra-specific information into Share911 / Share999
6. Ensure Registration email domain is set properly in Share911 / Share999
7. Test SSO login to Share911 / Share999
Walkthrough
1. Access your root channel Integrations page in Share911 / Share999
First, log in to Share911 / Share999 with your administrator account. You should see multiple channels, including your organization's root channel. For example, if a normal channel is found at:
https://share911.com/acme/hq or https://share999.co.uk/acme/hq
...then the root channel will be found at
https://share911.com/acme or https://share999.co.uk/acme
If you do not see your organization's root channel, please contact support@share911.com or support@share999.co.uk and we will help you gain access.
Next, navigate to the SSO configuration page by opening your User Menu by clicking on your name in the top right, then Manage Channels => Integrations => SSO with SAML 2.0.
You will need the values of the following fields to set up the application in Microsoft Entra:
- Entity ID / Issuer
- Share911 / Share999 Assertion Consumer Service Url

2. Create a Share911 / Share999 application in Entra
Once you have logged in to Microsoft Entra, create a new Enterprise Application and open it's "Single sign-on" configuration page.
2.1 In Section 1, Basic SAML Configuration, update the following fields:
- Identifier (Entity ID): https://share911.com or https://share999.co.uk
- Reply URL (Assertion Consumer Service URL): https://share911.com/sso/saml/acs or https://share999.co.uk/sso/saml/acs
2.2 In Section 2, Attributes & Claims, create mappings for each data field you would like Share911 / Share999 to be provided when your users log in. The Share911 / Share999-side of the mapping uses the following names:
- firstname
- lastname
- title
- employeeId
- managerId or managerIds
- mobile
IMPORTANT: Make sure the Namespace field for each Attribute/Claim is empty! Entra sometimes populates it with a URL-like value which needs to be deleted.
2.3 Lastly, copy the App Federation Metadata Url value for use later in Step 4.
To learn more about the metadata format, see Federation metadata
3. Grant access to the Share911 / Share999 SAML app
Now that you've created your Share911 / Share999 application, let's give people permission to use it. Do this through the "Users and groups" menu item on the left. Assign the app and access to whichever Groups make sense for your organizational structure.

4. Enter Microsoft-specific information into Share911 / Share999
Now we use the App Federation Metadata URL that you copied at the end of Step 2. Share911 / Share999 uses this to know where to send the SAML requests and authenticate using the included certificates.
Once you have the URL copied, switch back to the Share911 / Share999 browser tab and paste it into the Option 1. IdP Metadata Url field.

5. Enable SSO Integration
Now our set up is complete in both Entra and Share911 so we can check the Enable integration? switch to turn on SSO.

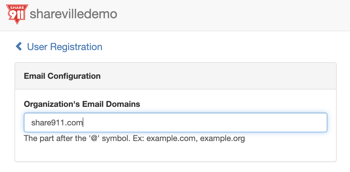
6. Ensure Registration email domain is set properly in Share911 / Share999
At this point SAML integration is complete but we also need to ensure that Share911 / Share999 knows to attempt a SAML login for your users. To do this, check that the email domains on the Share911 / Share999 Registration page are correct for your organization. Only domains included here will be eligible to use SSO.
Go back to the main Manage Channel page, then select "Registration" to open the "User Registration" page.
Ensure that the Email Domains field has the correct email domain(s) for your organization:
OPTIONAL: Setup Self-Registration
If staff should be allowed to self-provision and join Share911 without needing an invite / user import, you can enable Self-Registration. This is done on the individual channels so that you can control which channels people can select when enrolling. Self-Registration is not available for root-level or group channels.
To enable Self-Registration, go back to your My Channels page to see the list of all channels you have access to. Then select a channel and open your User Menu in the top-right. Next, select Manage Channel => Registration and check the "Enable self-registration?" box. If the box is disabled then Self Registration is not available for that channel type.
7. Test SSO login to Share911 / Share999
Now you can test the SAML integration. Open a private browsing session to Share911 / Share999 and enter your email address into the Share911 / Share999 login page. You should now see an option to "Log in with SSO".
Click that link will initiate a SSO SAML request to Microsoft Entra and should grant access to your Share911 / Share999 account. If not, please contact support@share911.com or support@share999.co.uk so that we can help troubleshoot what went wrong.
And you're done!