Share911 / Share999's Import feature allows you to import your locations by uploading a spreadsheet containing the required location data.
1. Obtain the Required Permissions
To import locations, your account must first have the Manage Channel and Manage Users permissions. If you need to have these permissions added to your account, please contact your Share911 / Share999 account admin or email support@share911.com of support@Share999.co.uk for assistance.
2. Create your spreadsheet
File Formats
Share911 / Share999 supports the import of location data via spreadsheets in XLS, XLSX, ODS, or CSV format.
Required Columns:
Channel ID
Name
Optional Columns:
Building
Floor
Door
Side
If you need to delete a location, you can create an “Action” column and write “Delete” on the row of the location you want to remove.
Example Import File
Click here for an example spreadsheet: Example Locations Import
Determining Channel IDs
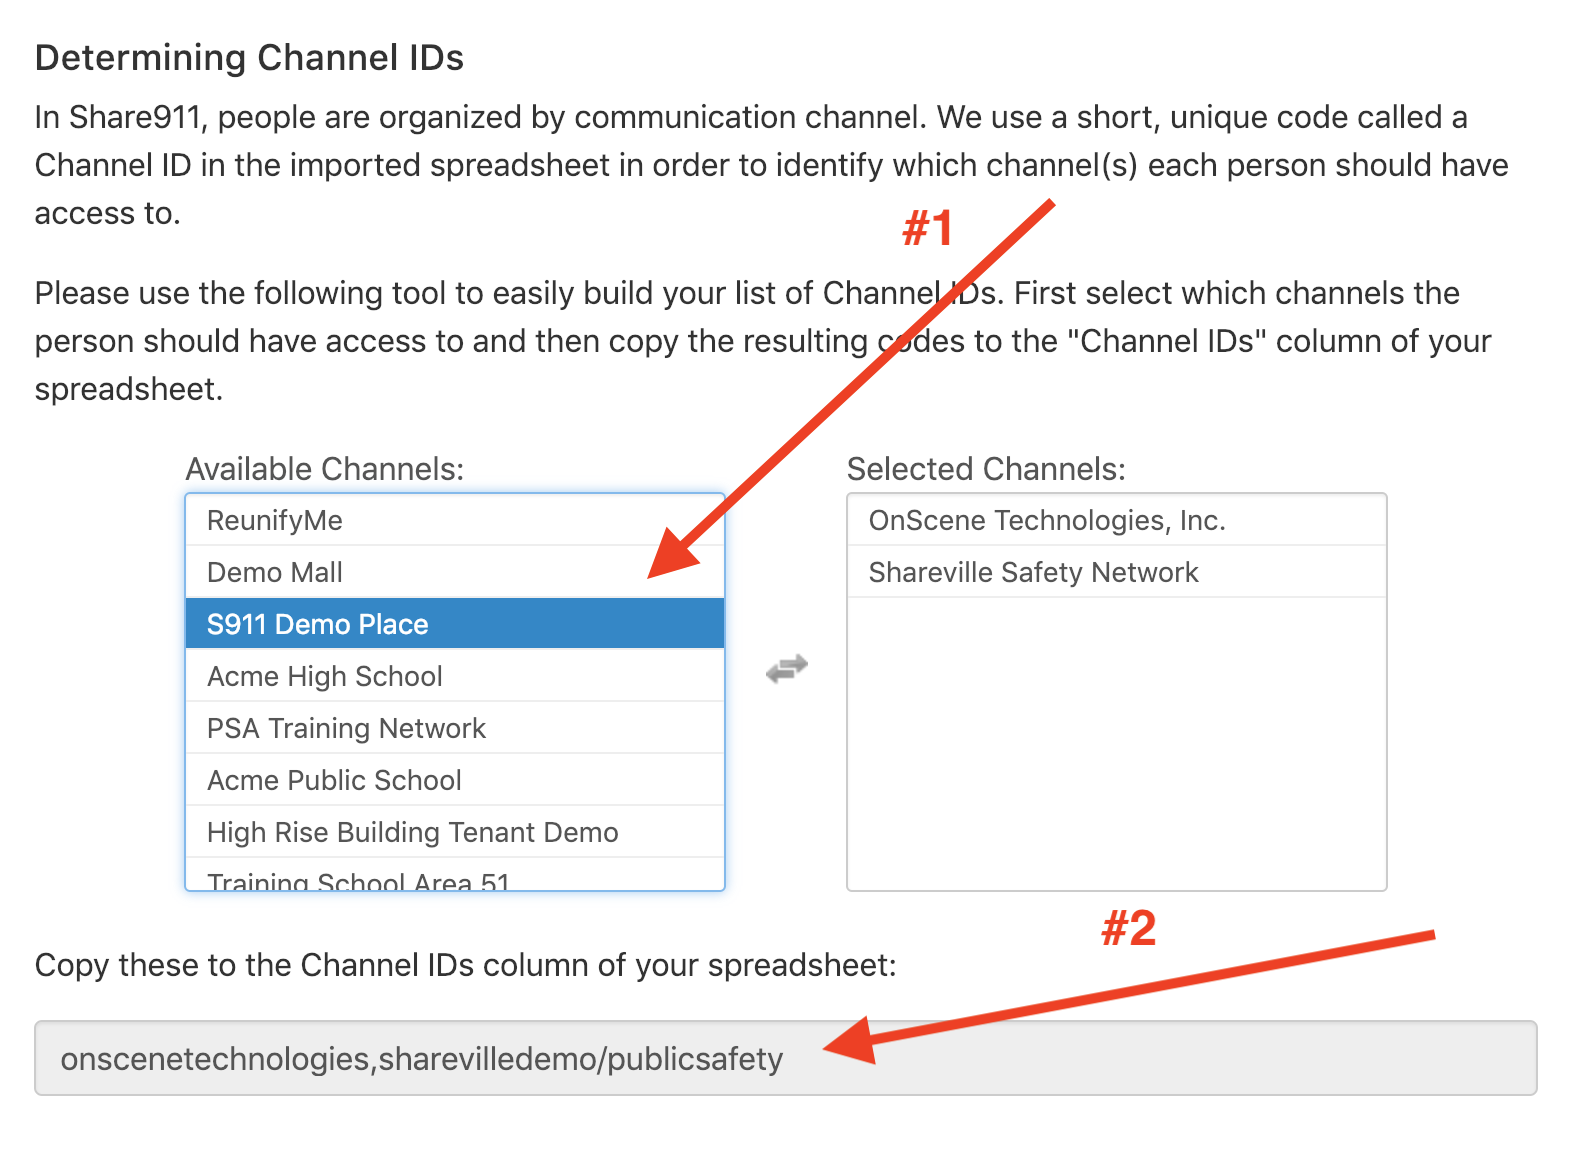
The bottom of the Import People page has a tool which you can use to look up Channel IDs for channels. Channel IDs are the unique code that we use to identify a specific channel and are used in your spreadsheet to indicate which channel(s) you want to add locations to. We use Channel IDs rather than channel names since the names may change while Channel IDs are permanent.
First select the channels that you want to add locations to. The Channel IDs for those channels will be displayed in the text box underneath. Then copy the contents of that text box and paste it into your spreadsheet under the Channel ID column.
If you would like to use your organization's own Work Location IDs, please contact support@share911.com or support@share999.co.uk. We will map your Work Location IDs to the communication channels in Share911 / Share999.
3. Visit the Import People Page
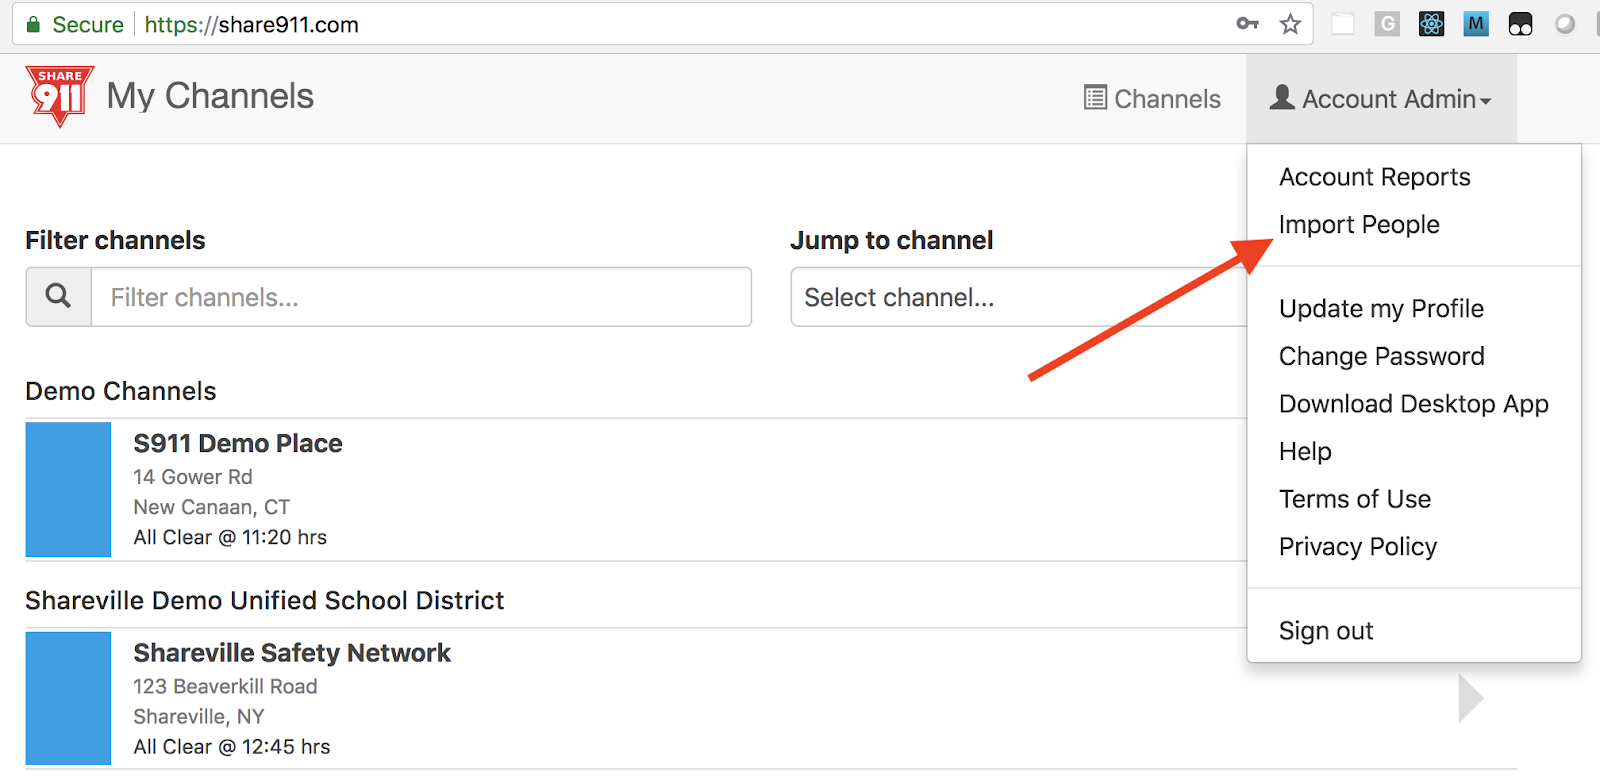
Locations get uploaded the same way that you upload user data - via the Import People link. This link is located near the top of your User Menu, found by clicking your name in the top-right and selecting “Import People.”
4. Perform the upload
Drag your spreadsheet onto the page or click the "Click here to select file" button to initiate the import.

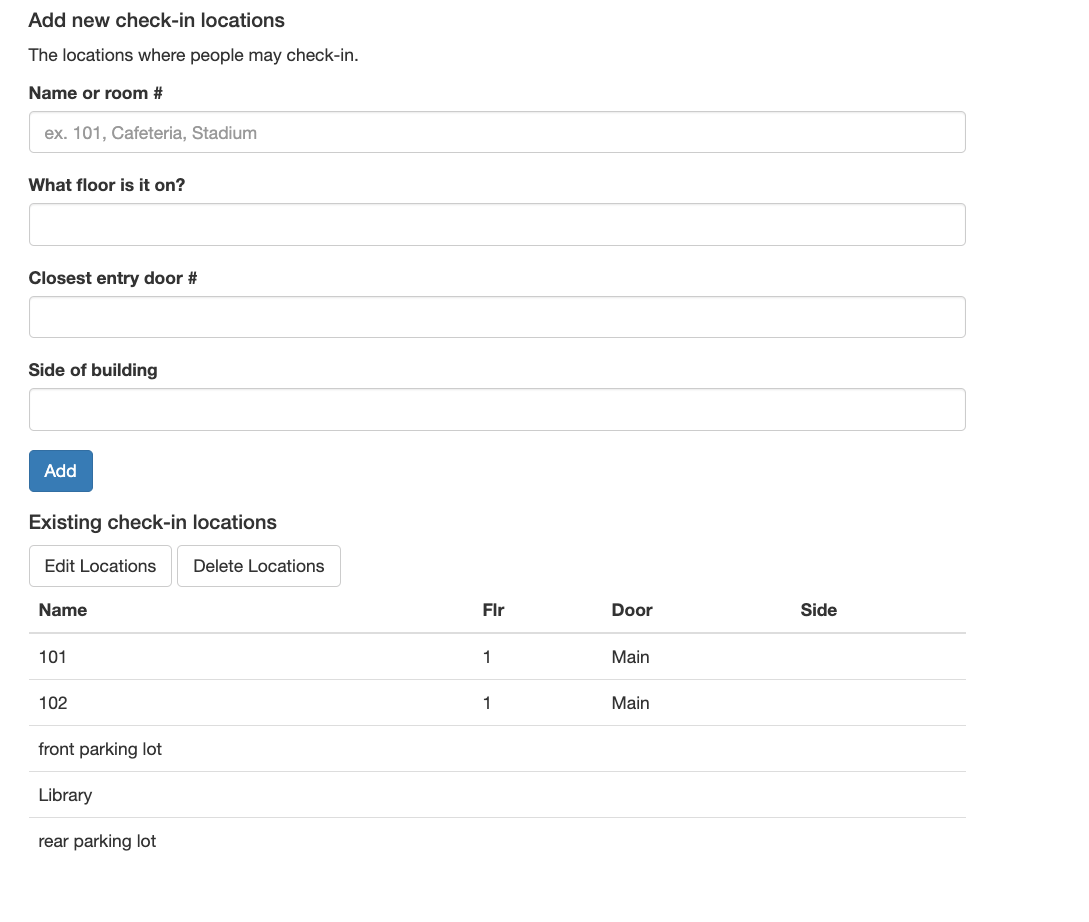
Once your spreadsheet has been processed, your locations will populate on the Manage Channel => Locations => Check-in Locations page
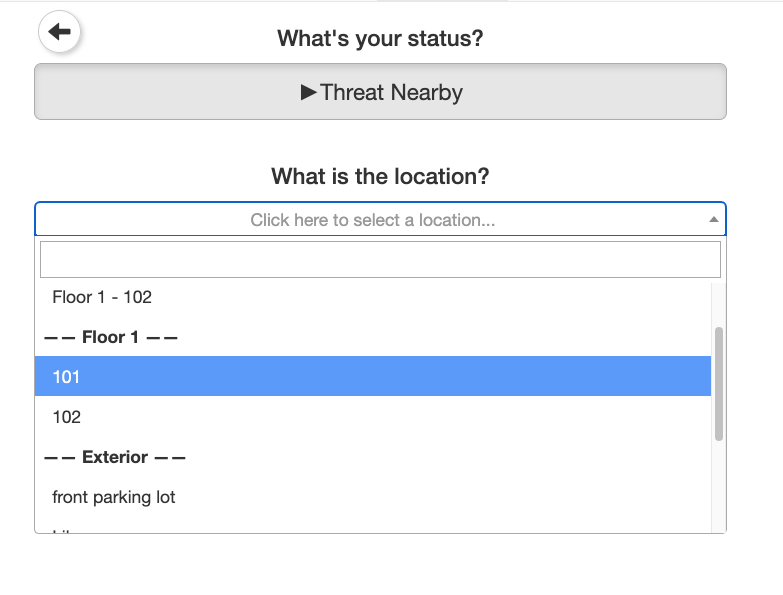
You will also see the locations on the check-in page.